Crafting a 2,500-LED Matrix That Fills an Entire Wall

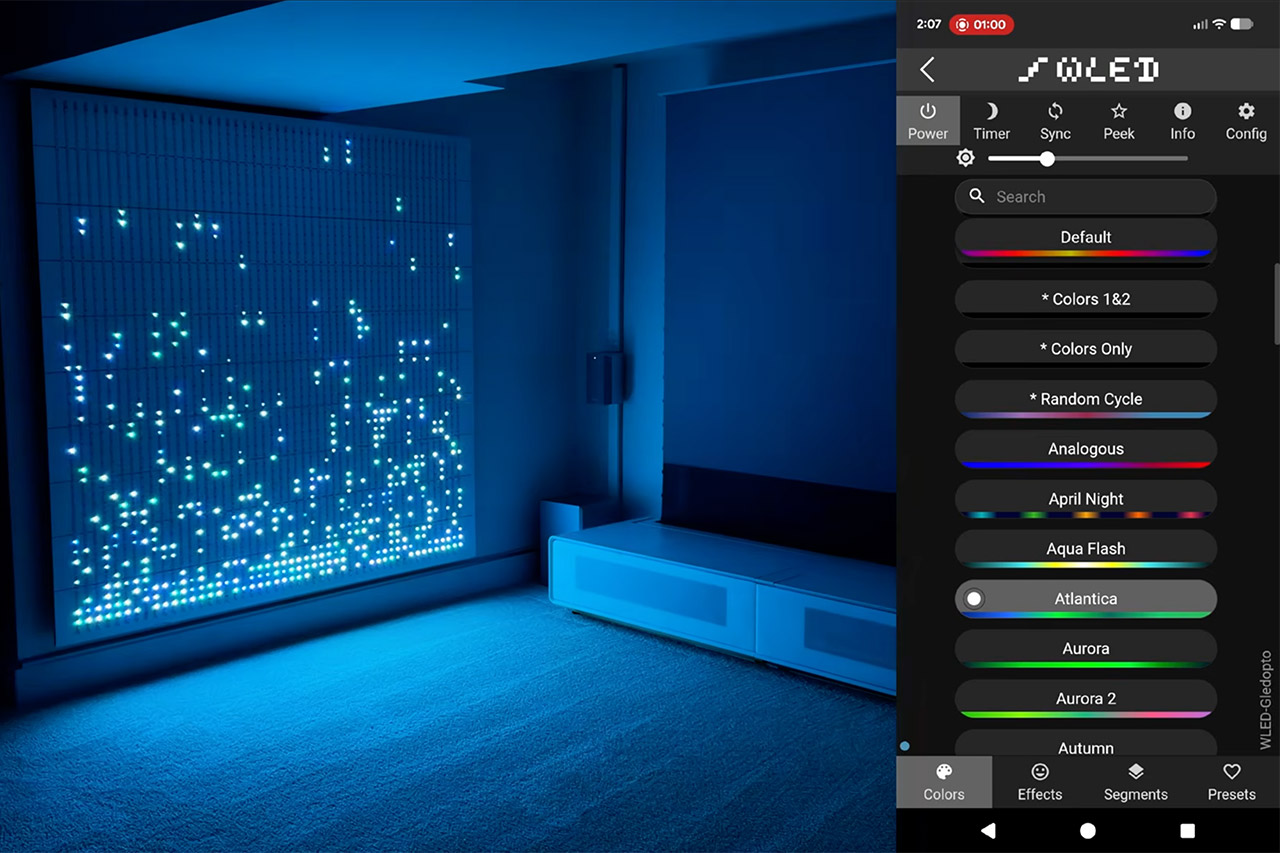
Rooms come alive as thousands of LEDs illuminate in perfect time over a large 50×50 panel. Chris Maher took on this task by converting regular light strips into that massive display without breaking the bank or requiring several controllers. His finished presentation plays well on a single 12-volt power supply and some pretty tiny gear, offering professional-looking animations, text, and patterns.
Chris purchased 18 5-meter rolls of 12-volt SK6812 strips, each with 30 LEDs per metre, so obtaining the necessary components was simple. He then sliced each roll into three 50 LED portions, for a total of 54 segments, plus a few spares for safety. To provide support, he built a simple wooden frame out of one-by-two boards and some board-and-batten panels. The rest of the kit consisted of a few short sections of 18-gauge silicone wire, lever-style connections, rubber grommets, and a Gledopto 4D-EXMU controller loaded with WLED firmware, as well as a standard 12-volt power supply.
Sale

Govee Curtain Lights Pro, Upgraded 960 LEDs Smart Color Changing LED Curtain Lights with AIGC, Dynamic…
- Smoother, Silkier Animations: Featuring 960 ultra-dense RGBIC LEDs and a next-gen 20x-speed chip, the smart curtain lights support high-capacity…
- Higher Creative Freedom: Unleash creativity with the led smart curtain lights, offering a 30-layer canvas for uploads, 1,000+ assets. Craft stunning…
- Year-Round Lighting: The curtain fairy lights bring any occasion to life with 250+ preset modes, tailored for holidays, parties, and daily ambience…
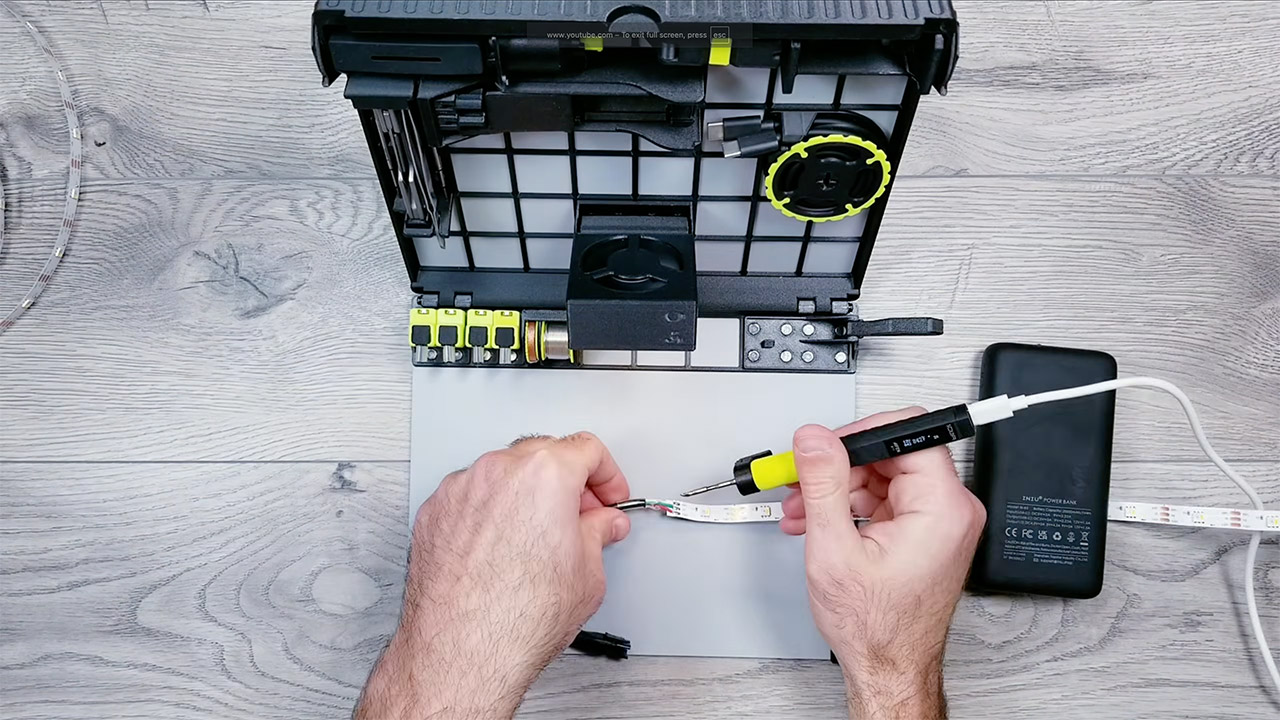
First, he had to get the strips ready to go, so he carefully removed the connections from the ends, soldered the exposed pads, stripped, tinned, and prepared all of the wires for connection. This preliminary work made the final assembly a lot simpler. Next came the frame, which he built by stacking and screwing the boards together to form a solid rectangle the same size as the finished grid. He added some board-and-batten panels to the front to provide a firm surface to screw the strips to. He painstakingly wrote out the places of each strip, ensuring that they were perfectly spaced from edge to edge. He then placed the strips down in a zig-zag pattern, alternating direction row by row, to form a single long continuous data channel.
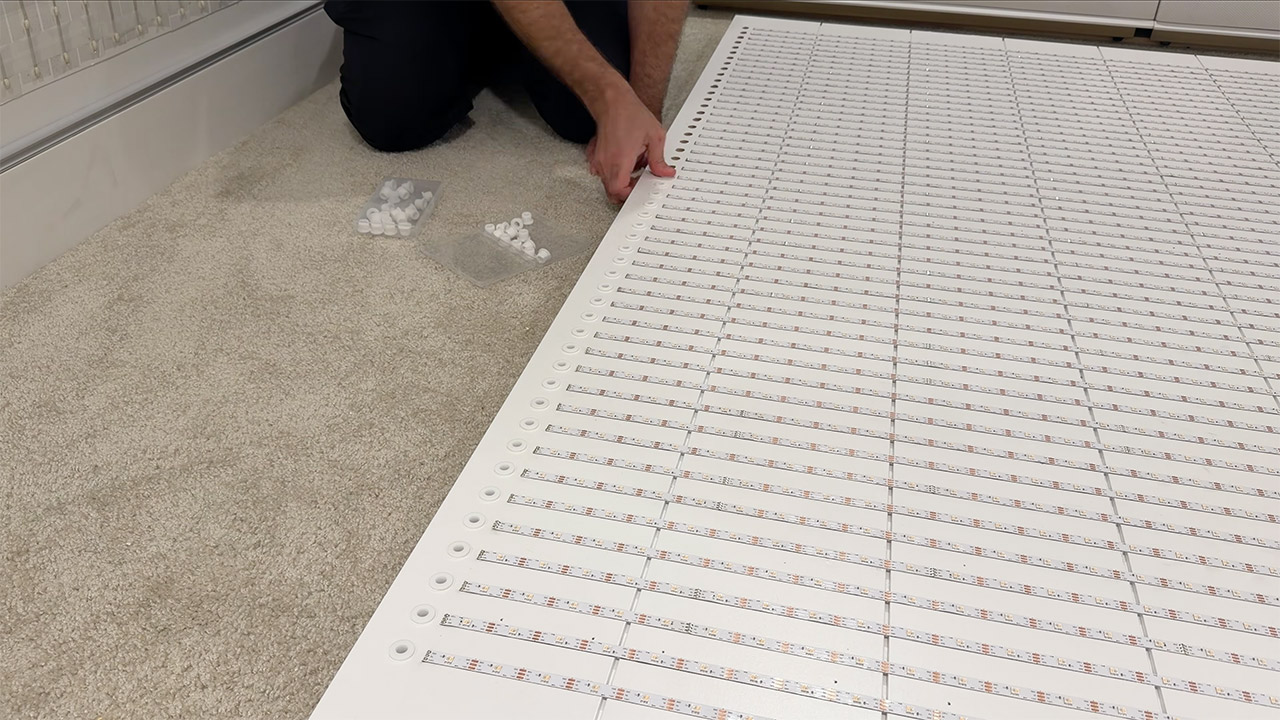
Holes were drilled above and below each strip, and rubber grommets were inserted to allow the wires to pass through to the back side while keeping the front of the display neat and free of connections. At several spots, lever-style connectors were utilized to connect the power and data lines, and separating the grid into four distinct data runs ensured that everything remained in sync.
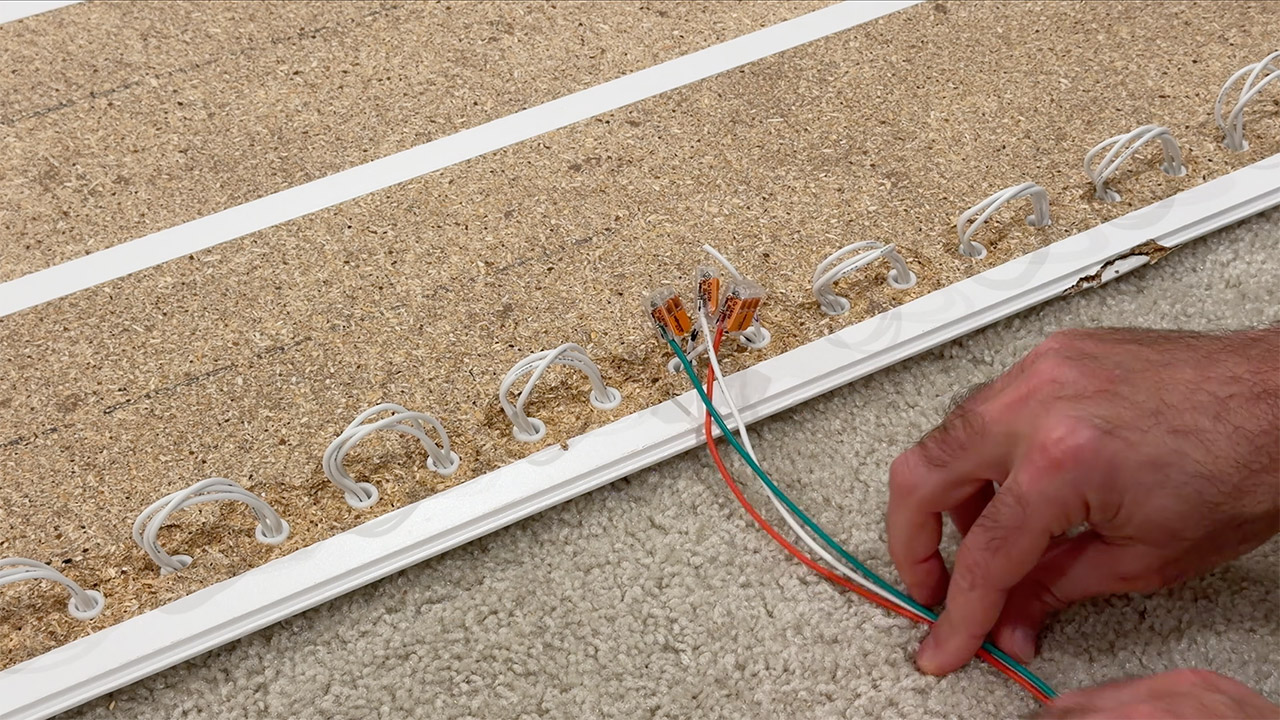
The wiring was rather simple, as you just connect the voltage, ground, and data wires in that order. He utilized colored wire markers to keep track of which was which during assembly. The controller and power supply were fastened to the back with simple clips and wooden blocks. A French cleat system on the back makes it simple to mount the complete panel to a wall. Once he had everything configured inside the WLED interface, it was only a matter of selecting the SK6812 type, validating the 12-volt system, and specifying the 50×50 pattern with a vertical zig-zag orientation. Some brightness limitations were set to protect the power supply, and four data outputs were allocated to each block of LEDs. Once everything was saved, the display would respond promptly to requests for colors, effects, or scrolling messages.
[Source]
Crafting a 2,500-LED Matrix That Fills an Entire Wall
#Crafting #2500LED #Matrix #Fills #Entire #Wall